Skip to content


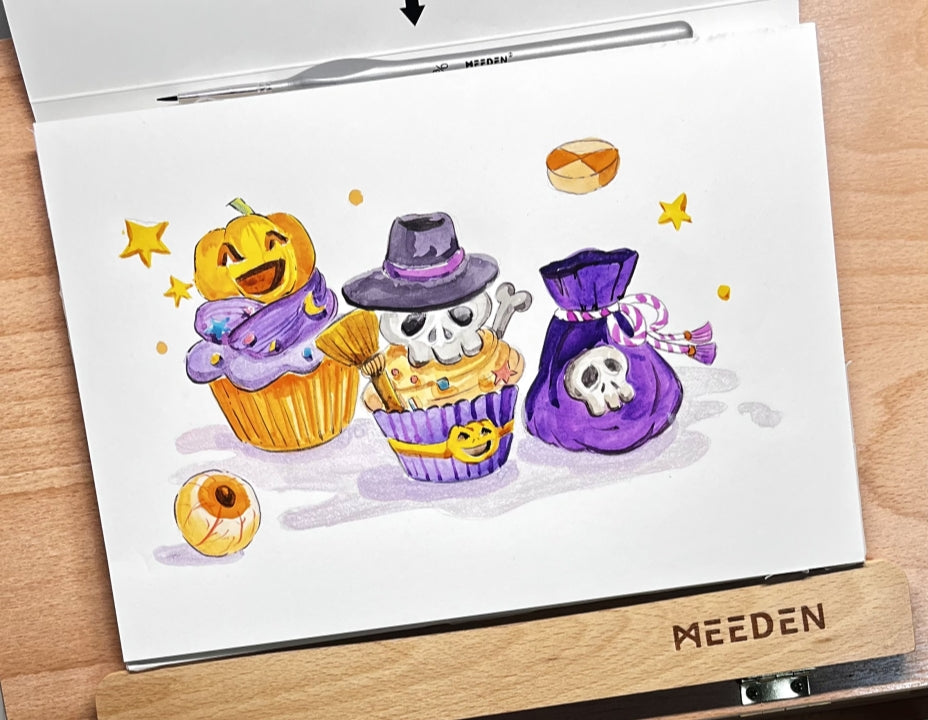
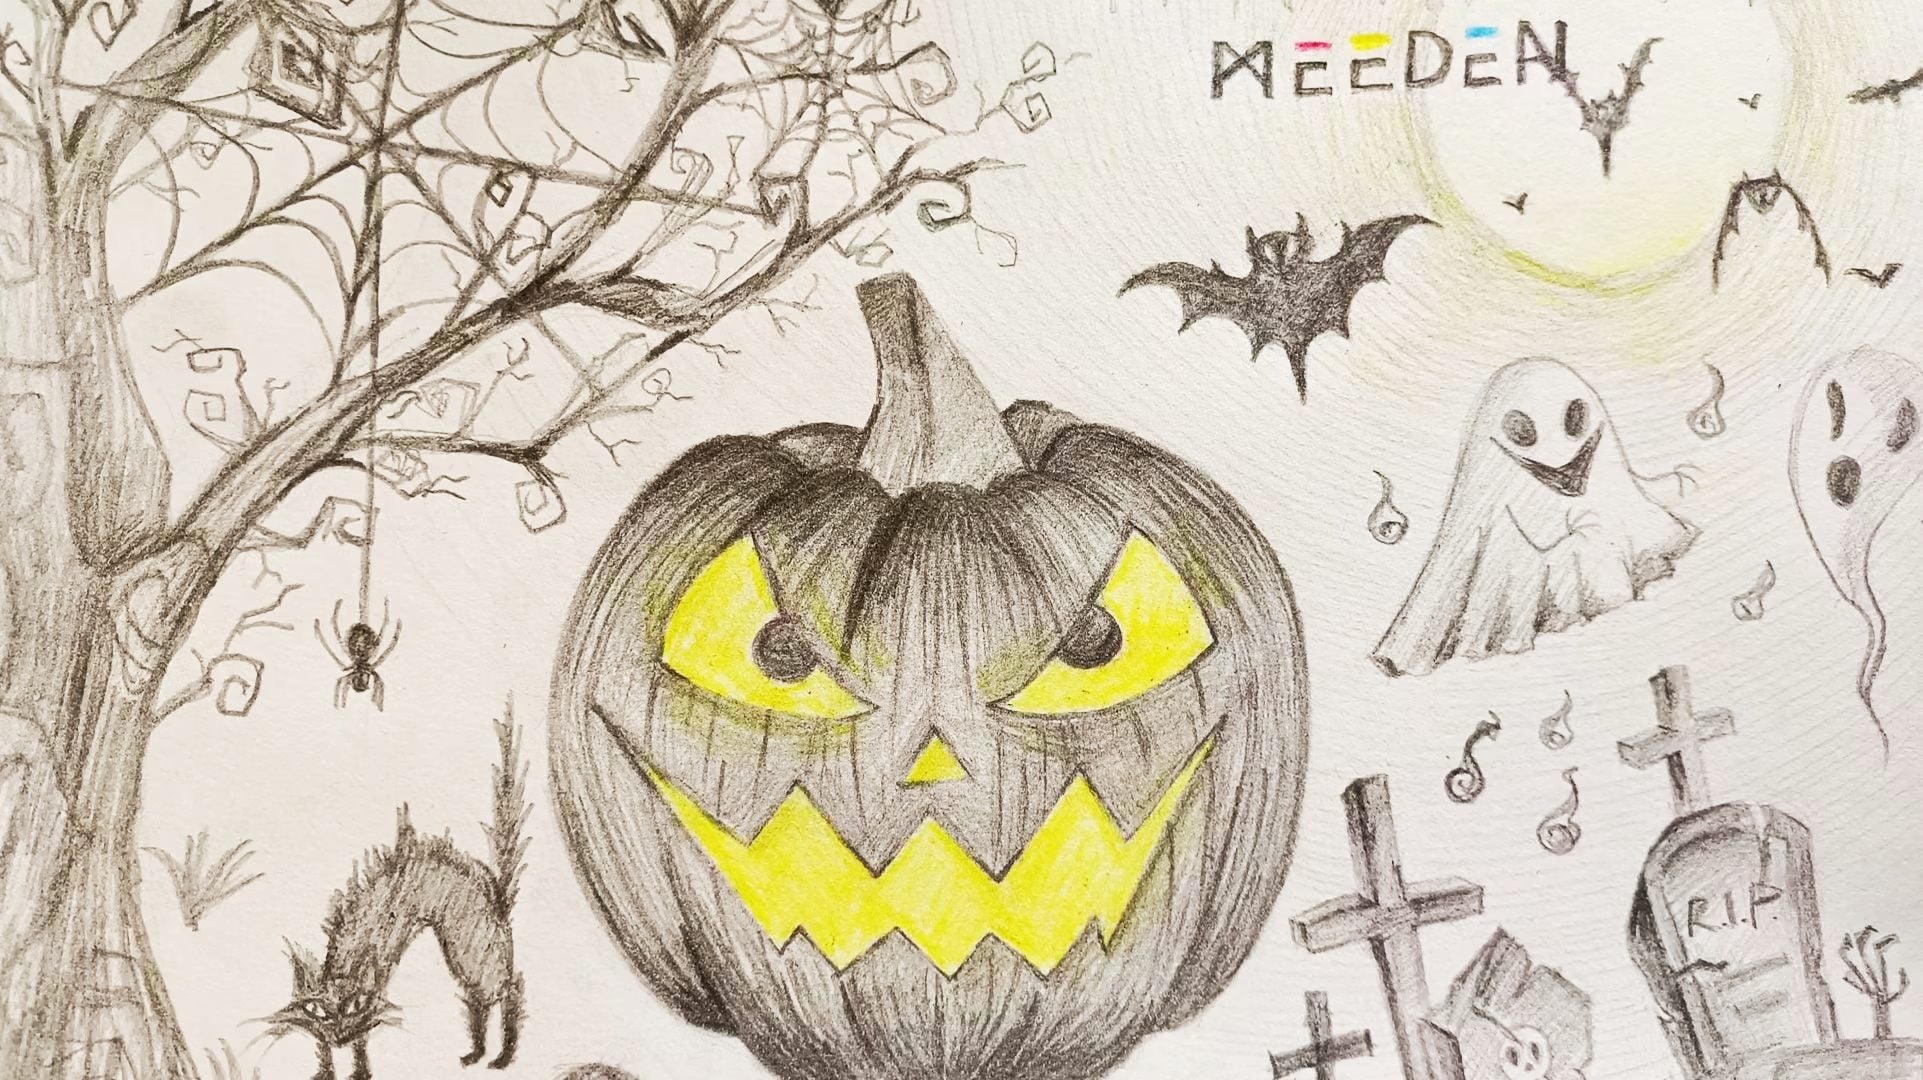
Happy Halloween! Today, we are going to embrace the spirit of Halloween and create a captivating pencil drawing. Halloween is filled with various iconic elements such as pumpkins, candles, skulls, witch hats, and candy corn, just to name a few. Fantastic! Let's harness our imagination and select a few of these elements to incorporate into our artwork. Additionally, we need to choose a central element that will take center stage in our composition. It could be a castle, the moon, or even a pumpkin – it all depends on your personal preference. For this demonstration, we chose a pumpkin as the main focal point, along with secondary elements like a spooky tree, spider webs, a black cat, bats, ghosts, and tombstones. Are you ready for some Halloween art inspiration? Let's begin our creative journey!
Part1: How to Draw a Pumpkin Easy Step by Step
Firstly, we start drawing the Halloween pumpkin. Since the pumpkin is the main element, let's place it in the middle of the composition, taking up a large area.
Step 1 - Drawing the Basic Shape:
Start by drawing an oval shape in the middle of your paper. This will be the main body of the Halloween pumpkin. Next, draw two vertical lines inside the oval to mark the position of the facial features. Towards the top of the oval, draw a stem for the pumpkin and embellish the lines around it to give it a raised appearance.

Step 2 - Creating the Pumpkin's Shape:
Starting from the middle of the pumpkin, draw another oval shape. Then, on each side of this oval, draw a half-oval shape. Pay attention to the starting and ending points of the lines. These shapes will form the overall shape of the pumpkin.

Step 3 - Adding Facial Features:
Now, let's give our pumpkin some personality by adding facial features. Let your imagination run wild and experiment with different facial expressions and details. You can use simple shapes like triangles and semicircles. Alternatively, you can refer to other Halloween pumpkin face references for inspiration.

Step 4 - Refining the Outline:
Adjust the outline of the pumpkin by erasing any unnecessary lines. Clean up the drawing and make sure the proportions are correct.

Step 5 - Adding Depth:
To make the pumpkin look more three-dimensional, we can add some shading using a pencil. For the base layer, use slanted cross-hatching lines. As for the surface layer, try to follow the natural contours and veins of the pumpkin, emphasizing some areas and softening others.

Part2: How to Draw a Spooky Tree
In the spirit of Halloween, why not add some eerie trees to your artwork? Next, let's draw a black Halloween tree on the left side of the composition.
Step 1 - Creating the Tree's Shape
Imagine the bare branches of a winter tree and use a pencil to roughly sketch the trunk and branches. Feel free to draw twisted and creepy-looking branches to enhance the spooky atmosphere.

Step 2 - Adding Stark Details:
Use sharp and harsh lines to add details, emphasizing the withered look of the tree. This will give the tree a sense of barrenness and enhance its eerie appearance.

Step 3 - Adding Depth:
To heighten the horror factor, use a pencil to add some shading and curved and twisted smaller branches to the main branches of the tree. This will create a tangled and menacing effect, adding to the overall spooky ambiance.

Part 3: How to Draw a Spider Web and a Spider
To further enhance the decrepit and eerie atmosphere of our spooky tree, we can add some spider webs and spiders. Let's start by learning how to draw a spider web.
We'll begin by drawing intersecting lines as the main framework, then gradually add inward-bending curved lines layer by layer. It's as simple as that! We can adjust the angles of the intersecting lines to create an irregular web structure for a more realistic look.


Now, let's proceed to add spider webs and spiders to our spooky tree.
Step 1 - Drawing Main Framework of the Spider Web:
We can mark eight points on the branches and twigs of the tree and connect them to form four intersecting lines.

Step 2 - Adding Layers to the Web:
Add 3 to 5 layers of curved lines to the spider web. We can also repeat the step on higher branches to draw smaller spider webs and enrich the composition.

Step 3 - Drawing the Spider:
Choose a random point on the spider web and draw a vertical line downwards. At the end of the line, draw a small spider. Use two circles, one large and one small, to represent the spider's abdomen and head respectively. Then, add spider legs from the middle of its body. If your spider is large enough, you can also add eyes for extra detail.

Part 4: How to Draw a Halloween Cat
What would Halloween be without a black cat? Let's add a startled black cat under the tree, scared by the spiders.
Step 1 - Sketching the Basic Form:
Using simple circles and triangles, draw the head and ears of the cat. For the body, draw a curved arc to represent the startled posture of the cat. Add simple legs and a straight tail.

Step 2 - Refining the Details:
Connect the body of the cat, adding eyes and whiskers. Make the fur on the tail stand up straight.

Step 3 - Adding Spookiness:
Color the cat black and make the fur around the outline stand on end to make it appear spookier.

Part 5: How to Draw a Tombstone
Now let's move to the bottom right corner of the composition, where we can draw some tombstones.
Step 1 - Sketching the Shapes:
Start by drawing small mounds of dirt at the bottom using curved lines. Then, based on your preference, draw tombstones of various shapes such as crosses, rectangles, semi-circles, triangles, etc.

Step 2 - Adding Details:
Add thickness to the simple geometric shapes of the tombstones. You can write some text on the surface of the tombstones or draw skulls. For added creepiness, you can draw bones on the mounds of dirt next to the tombstones or depict claws emerging from the ground. Lastly, add some cracks to the tombstones to make them look weathered and worn.

Step 3 - Adding Shading to the Tombstones:
The surfaces that are illuminated by moonlight can be lightly shaded, while the backlit areas should have darker shading. You can also add some weeds on the dirt mounds to make them look more desolate and abandoned.

Part 6: How to Draw an Ghost Easy
Halloween is not complete without some ghosts haunting the graveyard! Let's add some simple ghosts floating above the tombstones.
Step 1 - Sketching the Outline:
Start by drawing the outline of a floating ghost. Draw a round head and use wavy lines for the lower part, representing the flowing form of the ghost.

Step 2 - Adding Details:
Add eyes and a mouth to the ghost. Give the lower part of the ghost some folds to create a sense of movement. To make it less lonely, We also added a drop-shaped soul as its companion. They seem to be startled by each other, just adds to the spooky fun!

Step 3 - Adding Shading:
Add some shading to the backlit areas of the ghost to create depth and dimension. Since the ghost is white, we won't shade it too dark. You can also add some ghostly flames or orbs around the ghost to enhance the supernatural vibe.

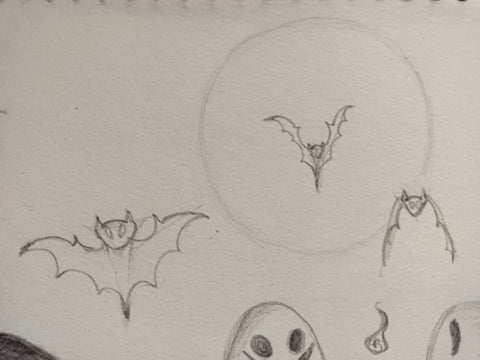
Part 7: How to Draw a Bat
To complete our Halloween-themed artwork, let's add some bats in the sky. We started by drawing a circle to represent the moon, creating a scene of a bat flying with the moon on its back.
Step 1 - Sketching the Body and Wings:
For each bat, we only need four simple triangles to build the body structure. Use two straight lines to indicate the position of the wings. Let's draw three bats in different stages of flight, showing the wings in upward, middle, and downward positions.

Step 2 - Refining the Head and Wings:
Now let's give the bat's head a more rounded shape and add eyes. Pay attention to the wings of the bat - there is a thumb-like protrusion at the upper part, while the rest of the wing is connected with curved lines.
Step 3 - Adding Details and Shading:
Fill in the bats with black, leaving the eyes exposed as they glow in the darkness. We can also add a few smaller bats in the distance to create a sense of a bat colony. They are often seen flying together at night.

Conclusion:
To add the finishing touches to your Halloween-themed artwork, consider using translucent colors such as colored pencils or watercolors. Adding a subtle yellow glow to objects like pumpkin lanterns, the moon, and ghostly flames can enhance the atmosphere of the scene. Of course, you can also experiment with blue, green, or even purple to create a more haunting ambiance. With these final touches, your Halloween-themed pencil drawing is complete.

We encourage you to unleash your creativity and try creating your own artwork! Let your imagination run wild and have fun capturing the spirit of Halloween in your artwork. Happy Halloween and happy drawing!
Feel free to leave your comments and ideas or upload your artwork to our website. For more Halloween inspiration, check out the collection of Halloween clipart elements.
Other posts you may enjoy:
- Five Creative Acrylic Painting Ideas - Unlock Your Imagination to Create Vibrant Artwork
- What Is The Distinction Between Different Pigments
- How to Pick the Right Easel-Types, Tips & Pointers